Ok, so first of all let me tell you what the name RANCID actually means. It literally is named “Really Awesome New Cisco Config Differ”. How cool is that! Now, if you name your creation like this, you would have to make sure it lives up to its expectations. Well, I have installed it for one of my customer’s, and let me tell you, it surely does live up to its name and more..
It can not only do automated configuration management of your cisco equipment but Juniper,F5,Palo Alto and more. I have literally not even worked on the multitude of devices Rancid supports. There are many vendors out there besides Cisco. And yes, did I tell you it can shoot out automated mails once it detects that there has been a change to the device configuration? No more outages because some new NOC guy was fooling around with one of the routers for his CCNA! Not only this, you can even set up a web interface to track the configuration changes and have a pretty sleek view. The installation I did for one of my customers is working like a charm!
I am a very lazy guy. I love working with Cisco and Juniper routers and switches and solving routing issues. But there comes a time when you have to take a pause and rethink of whats going on and take a decision. Do you continue like this or do you stop lazing around actually learn something new , something very cool ? That was the time I decided to see if I can setup some open source network monitoring tools for one of the customers I handle with my current company. And yes, convincing your company and your customers for a VM in a production environment is a painful task than the actual Rancid implementation.
Rancid was not new to me. Neither was Smokeping. But until that Eureka moment, I thought monitoring tools is what system admins do and not network engineers. Its a Sysadmin job! However, looking at the current competition for network engineers in the Indian market, I had to leave that wishful thinking behind.
So I started to read and to be honest, Linux was and still is Hebrew to me. It is not so simple, at least for someone who doesn’t come from the programming world. The only reason I am a network engineer is because I HATE programming! But then, all the cool tools that I wanted to make use of for the customer ( Rancid,Smokeping,etc)were based on Linux so I had to give it a try. Well, I do not regret that decision! ( although Linux is still Hebrew to me).
Do you know there are a variety of Linux distributions out there (Redhat,Ubuntu,FreeBSD,CentOS,etc) ? There is nothing called “Linux” which I can just download and get started. So I had to read up on which distribution suits me well. Ubuntu was my choice here and its really awesome! Thanks to the ubuntu guys , installation of any tool on top of Ubuntu is just one command task ( Literally !). All I had to do is download the latest Ubuntu server from their website and get started. And yes the only command to install Rancid on top of Ubuntu is “sudo apt-get install rancid”. Yes, that is it!
The cool thing about Linux distributions is that they are free unlike Windows ( so no need of looking for torrents)
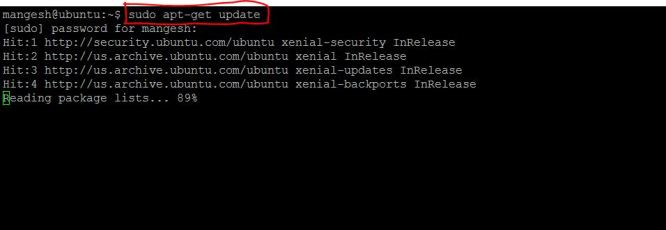
ok, so by now you should have downloaded Ubuntu Server . I downloaded the 16.04 LTS version which worked pretty well. The first thing you should do is update the repositories on your Ubuntu machine with the command “sudo apt-get update”. What this will do is go over the internet and pull up the latest information on the available installations you can implement on Ubuntu( at least this is what I think it does).
Once this is done, you can install rancid right away. The only command you use for this is “sudo apt-get install rancid”. This will install rancid and all other packages it is dependent on for eg. sql.
The installation will create a user and a group called “rancid” with home directory of /var/lib/rancid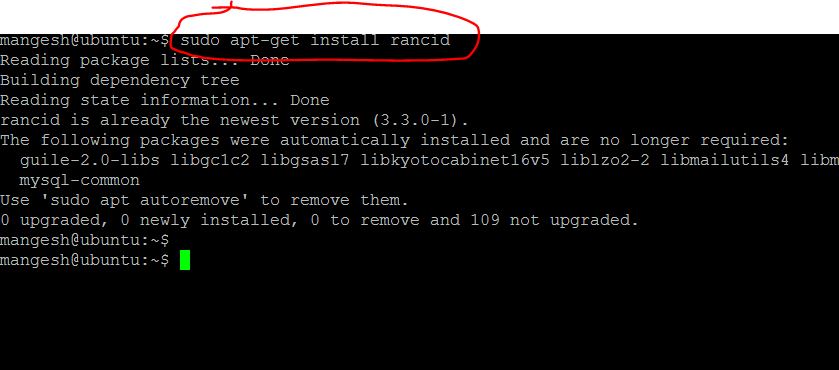
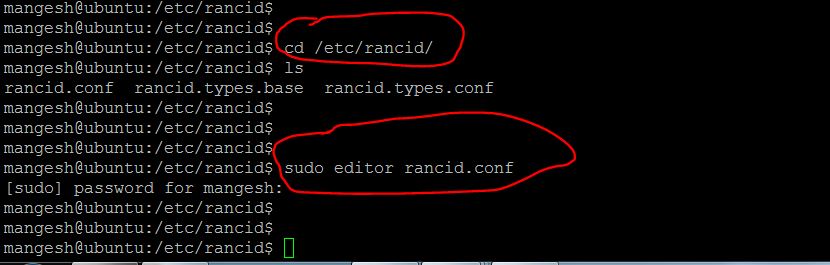
Once you are done installing rancid, you can go over to /etc/rancid and modify the rancid.conf file to create your “LIST_OF_GROUPS”.In simple words, this is just a way to organize or group your networking inventory . For eg. in a large network, one would like to group all routers together and all switches together for better management. Someone would like to group devices per location for eg. Mumbai, Banglore,etc. For me, I just created one group for my customer since it was a small DC. It can be also something generic like “networking” or weird like “starlords_network”. No one cares! For multiple groups just separate them with spaces and you are ok.
P.S : the way to go over to a different directory in linux is with a “cd” and to go one folder up is with a “cd..” .Also the way to comment a line in any config files is with a “#”, so you would need to remove the “#” in front of your LIST_OF_GROUPS for it to be accepted as a valid config line. This applied to other files in linux as well.

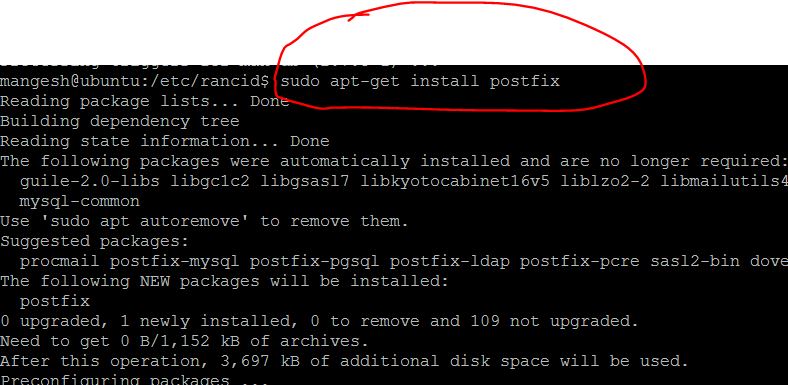
Ok, I just forgot one tiny thing. To make rancid send automated mails , you would need to install and configure “postfix”. Its just something cool which handles emails in Linux. Guess the command for that..yes you are right…”sudo apt-get install postfix”.
Postfix will ask for some self explanatory inputs while you install it for the first time. Just feed your domain name ( eg .mydomain.in) and your SMTP relay server ( eg. mysmtprelayhost.mydomain.in) when asked . You can change these setting anytime later very easily. In simple words, you would just need to point your postfix server towards your SMTP relay server so the SMTP relay server can send emails outside of your domain on behalf of postfix.
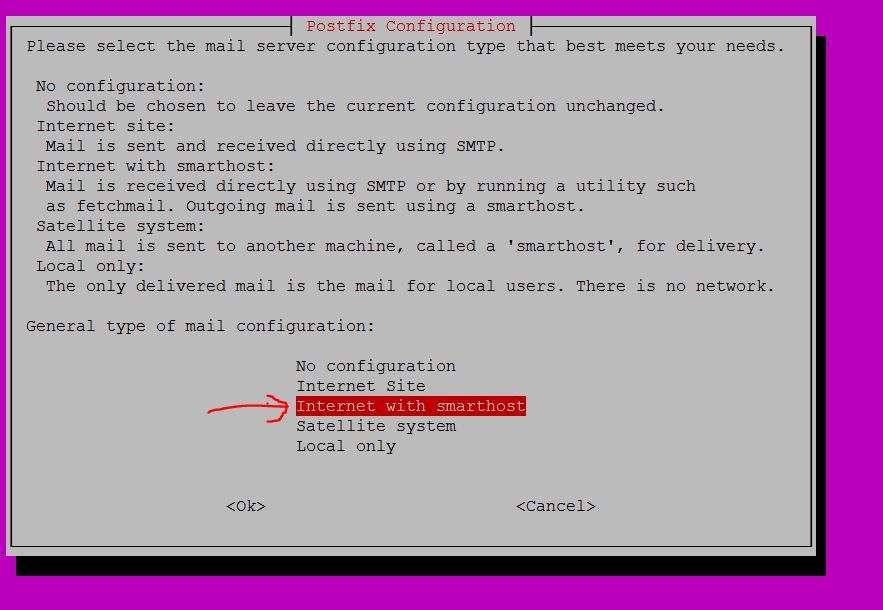
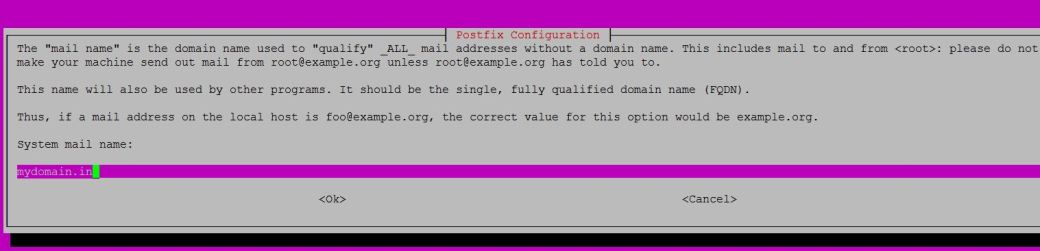
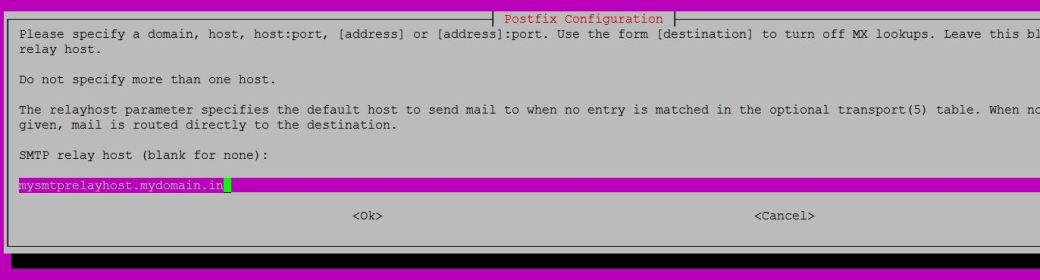
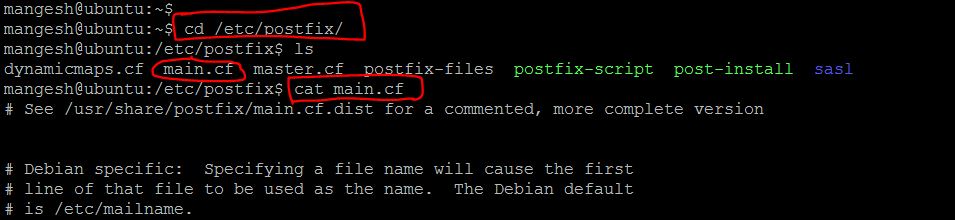
All postfix setting’s can be changed from /etc/postfix in the main.cf file.
NOTE: “cat” command is used to read a file in linux. “sudo” means executing a command as a superuser (a user with the highest authority in the linux system).
We can edit files with “sudo editor ”
Ok, back to rancid.
Rancid sends emails out when configuration changes are made. To send these mails out, it uses postfix and the “aliases” file. So we will need to create some entries in the aliases file. Rancid sends two types of mails.
- For network changes for eg.router addition /deletion via “rancid-admin-” . Lets say these will be your system admins.
- For configuration changes via “rancid-” . These could be your NOC guys.
So we create two entries per group we created earlier with LIST_OF_GROUPS and ask RANCID to send mails to the desired address and update the changes with “newaliases”.
eg.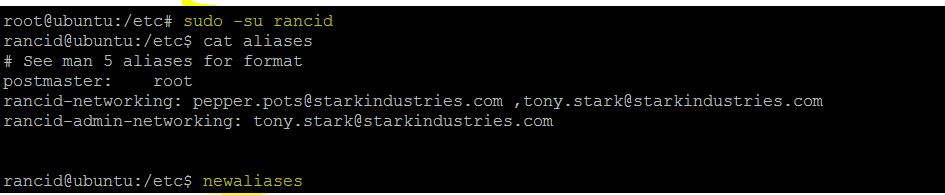
Ok, one more tiny thing. Rancid uses a repository system to store the device configurations. There are two types of it. CVS and subversion (SVN) . Lets just say they create new versions of the configurations every time there is a change in it. This way you have an independent version each time something was changed in the configuration. For eg. interface config, bgp config, new firewall rules, etc. Here,I prefer using subversion because I happen to like this blog. By now, you already know how to install SVN on your Ubuntu machine.
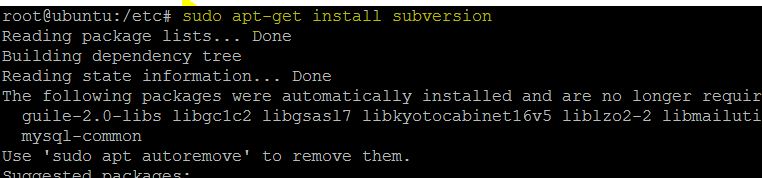
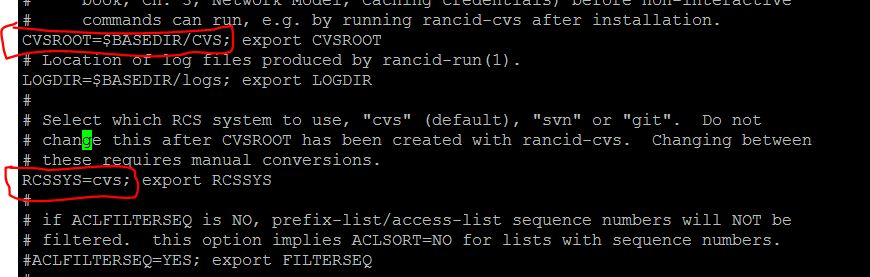
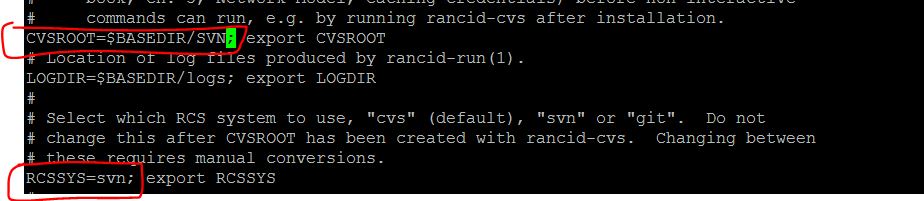
ok, back to rancid again. By default rancid uses CVS for its versioning system. We will have to modify it to use SVN instead. The way to do is is via the rancid.conf file in /etc/rancid directory
BEFORE:
AFTER:
Ok, so now with rancid installed, postfix installed and subversion installed, its time for some action.
Let us run the below command to get subversion to create some directories for us as per the rancid group(s) we created earlier in our home directory. This has to be done as the user “rancid” and not “root” or something else. We do this with “/var/lib/rancid/bin/rancid-cvs”
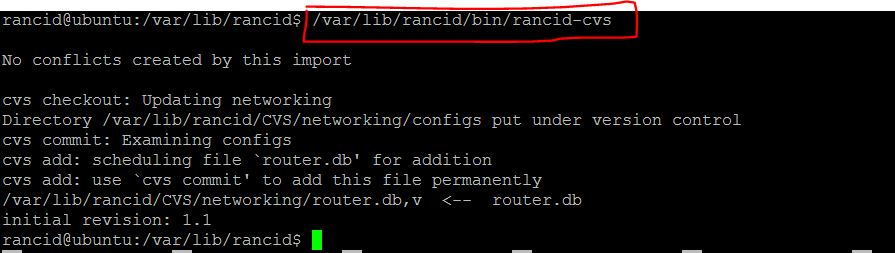
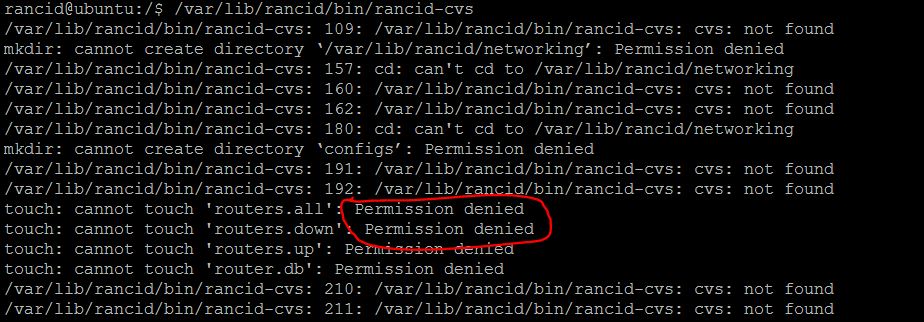
It is possible you might run into some folder permission issues like the below. At this time, just take over read/write/execute permission for all users for the affected folder with the chmod command. More on file & folder permissions in Ubuntu here.

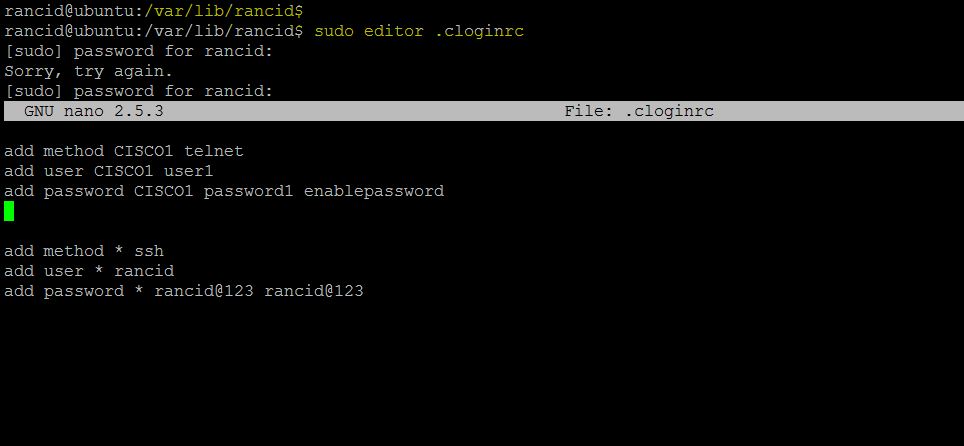
ok, we are almost there. I will save the easiest part for last. Now, lets understand what we are expecting RANCID to do for us. We expect it to log into our networking devices and pull up “running-config” for us with some other information like “show modules” ,”show flash” ,etc. The commands are vendor dependent. In a nutshell, we want the “rancid” user to be able to log into the devices we will ask it to config management on. For that, RANCID will lookup the cloginrc file in the /var/lib/rancid directory. cloginrc is nothing but a way to instruct rancid of how it should log into the devices for eg. Use telnet , user username1 and enable password1 for one device and use ssh , username2,password2 for the other. You get the idea.
The cloginrc files is kind of important so it is hidden. The way to access it is via adding a “.” at the beginning. The “*” refers to a wildcard which means use this method for all devices. In case you have some device which the rancid user cannot access or you want to use a unique login method for that, you can do that with specifying the method with the device name ( which the system should be able to resolve). There will be two passwords . One is for the login and the other is for enable mode.
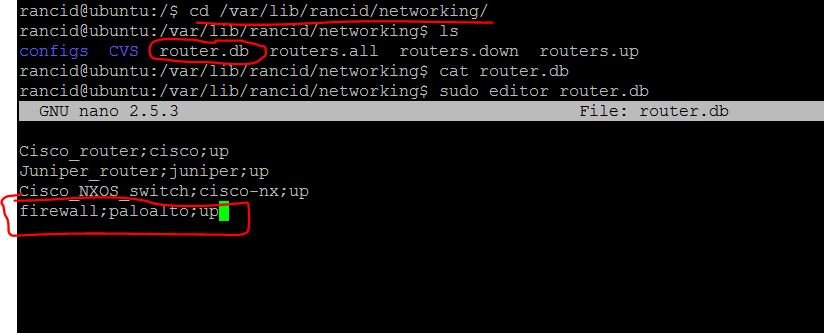
ok, so now is the time you just add devices to RANCID , so it can start doing what it is supposed to do. You do this by adding the device to the “router.db” file in the /var/lob/rancid/ directory . In this case, the group that was created was “networking”.
The way rancid expects this data is <DEVICE_NAME;;
where;
could be the hostnames of your devices (which the system should be able to resolve via DNS)
could be the one of the vendors rancid supports like cisco, juniper,palo alto,etc
is either up or down depending on whether you want RANCID to do configuration management or not do it and just ignore.
ok..so now the long wait is over..lets test it. Lets test if we can log into our device with the clogin file first. Looks like we can. We can test this with the below command.
sudo su -c “/usr/lib/rancid/bin/clogin -f /var/lib/rancid/.cloginrc ” -s /bin/bash -l rancid
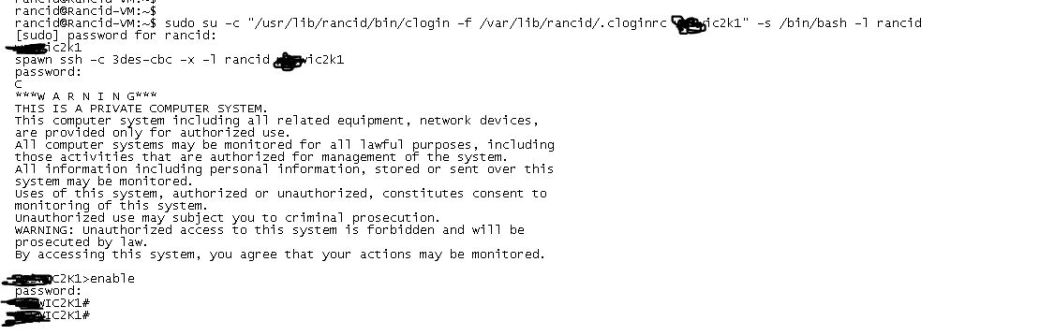
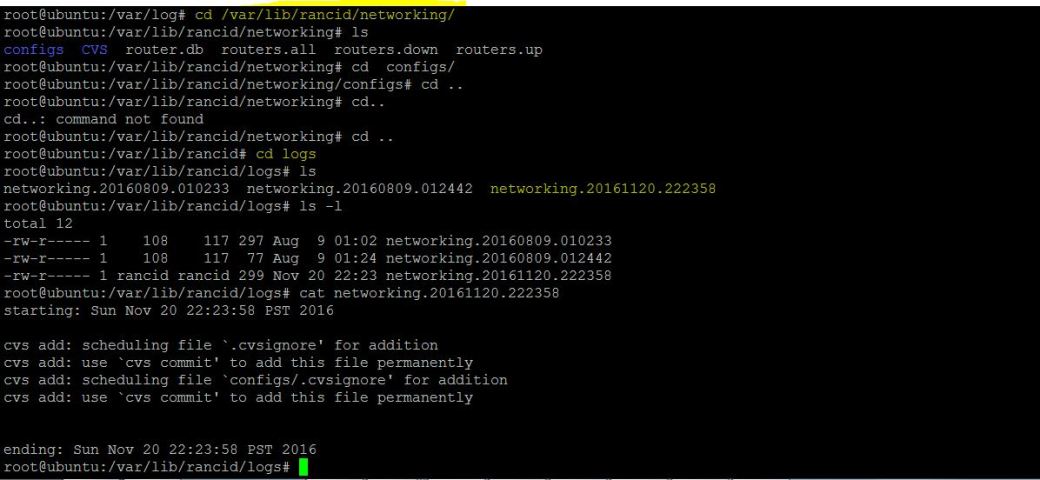
Once we can see that rancid can log into all devices with the cloginrc file, its time to do a manual rancid run with the below command. We can also check the logs that RANCID will generate for us in case there are some errors. Trust me, there will be a few errors but nothing which cannot be resolved with a few google searches. There is lot of rancid help out there!
sudo su -c /usr/lib/rancid/bin/rancid-run -s /bin/bash -l rancid
The logs will be stored in /var/lib/rancid/logs and the configurations will be stored in /var/lib/rancid//configs .
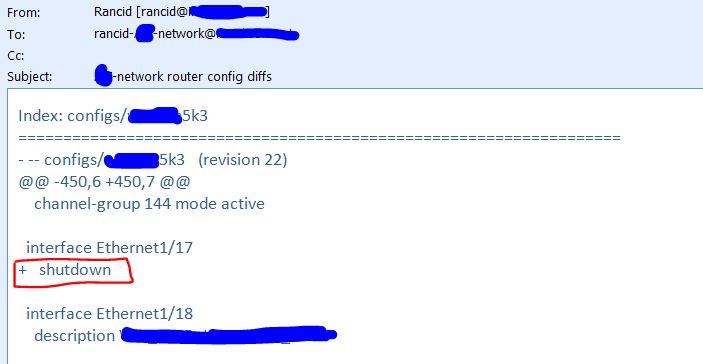
The final result will be like the below screenshot of the mail that was shot off when RANCID detected a change in the configuration of a switch interface which was disabled with a “shut” command.
And I think we are done unless you want to go ahead and automate RANCID so it runs at regular intervals while you take some sound sleep confident that no newbie NOC engineer is going to experiment with your Production network. After all, who wants to troubleshoot outages on lengthy phone calls and then explain to the customer that the outage was due to a “manual error”?
To be continued..
P.S : I am a total newbie to Linux and all my content has ultimately come from a lot of blogs/articles on the internet . Worth mentioning are:
1.Christian Elsen’s blog here.
2. Ubuntu documentation here.
3. Network Lore blog here.


Can I tell you how awesome is your website?
It is so beneficial for a person like me who struggles with networking on a daily basis (I work as a support engineer) due to lack of proper support and mentorship.
Most sites/videos assume that you are already a pro with IT stuff/networking/programming which is wrong in my opinion.
Your website is very well explained with step-by-step instructions.
LikeLike